Cleaning Ash and Grease From a Charcoal Grill: 6 Steps
Let your grill cool completely-wait 45 minutes to an hour-so hot embers don’t spark fires or melt trash bags. Remove grates and heat diffusers to scrub off grease and carbon buildup. Clear ash with a metal tool, checking vents and drainage holes. Clean the drip pan and grease trap, then wipe down the exterior with soapy water. Reassemble carefully, inspecting for warping or damage. Proper cleanup keeps your grill performing well over time, and there’s more to getting every detail right.
Notable Insights
- Let the grill cool completely for 45 minutes to 1 hour before cleaning to avoid burns and fire hazards.
- Remove grates and heat diffusers to access ash and grease buildup, soaking them immediately for easier cleaning.
- Clear charcoal ash and debris with a metal ash tool, checking air vents and drainage holes for blockages.
- Scrub grates and firebox using a grill brush with heat-resistant bristles while warm but not hot.
- Clean drip pan, grease trap, and exterior with soapy water, then dry thoroughly to prevent rust and damage.
Let the Grill Cool Completely
While you might be keen to start cleaning right after your cookout, it’s essential to let the grill cool completely before doing anything. Rushing the process risks burns and damages components, undermining both performance and longevity. Proper grill safety begins with patience-wait at least 45 minutes to an hour, depending on how intensely you’ve cooked. This cooling period stabilizes the internal temperature, making ash disposal safer and more effective. Hot embers can reignite or damage trash bags, so allowing coals to cool fully prevents fire hazards. You’ll notice the ash turns from gray and smoldering to a cool, powdery consistency-your cue it’s ready. Skipping this phase may save time, but compromises safety and efficiency. Responsible ash disposal protects your yard and household, reinforcing smart outdoor cooking habits. Letting the unit rest isn’t just caution-it’s a cornerstone of reliable grill maintenance. A well-maintained charcoal grill performs better over time and extends the life of your investment.
Remove Grates and Heat Diffusers
Once the grill’s cooled and you’re sure it’s safe to handle, you can start pulling out the grates and heat diffusers-these parts take the brunt of grease buildup and carbonized residue over time. Removing them is a key step in effective grill maintenance, allowing deeper access for cleaning and inspection. The grates, where food makes direct contact, accumulate stubborn grease and char, while the heat diffusers sit above the coals, protecting against flare-ups and managing heat distribution. Over time, blocked or warped diffusers can disrupt even cooking, leading to hot spots or uneven sear marks. Inspecting these components regularly helps maintain consistent performance. Most grates and diffusers are either porcelain-coated, stainless steel, or cast iron, each offering different durability and heat-retention traits. Pull them out carefully, noting their positioning for proper reassembly later. Immediate soaking speeds up degreasing, setting the stage for a more thorough cleaning. For tougher residue, using a best grill brushes for safe, easy cleaning can significantly improve scraping efficiency without damaging surfaces.
Clear Out Charcoal Ash and Debris
Since the grates and diffusers are out, you’re ready to tackle the ash and debris that’ve accumulated in the firebox-this stuff isn’t just messy, it can hinder airflow and drainage, both critical to consistent combustion and temperature control. Start by letting the grill cool completely, then use a metal ash tool or small shovel to remove loose ash. Dump it into a metal container; wet ash can clump and corrode the firebox. Ash buildup, if left unchecked, restricts oxygen flow and promotes uneven burns. Debris accumulation from drippings and old fuel also invites moisture retention and rust. Check the air vents and drainage holes-ensure they’re clear for ideal performance. A quick wipe with a dry cloth removes residual dust. This step isn’t glamorous, but it’s essential. Keeping the firebox clean prolongs your grill’s life and improves cooking results, making maintenance a smart investment in flavor and function. Choosing the right charcoal grill smokers can make cleaning and temperature management significantly easier.
Scrub Grates and Firebox With a Grill Brush
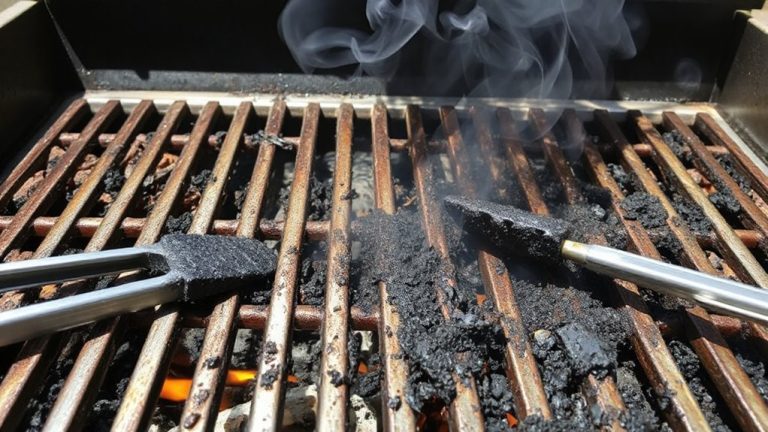
A thorough scrub with a sturdy grill brush is your best bet for removing stubborn grease and carbon buildup from both the grates and the firebox. For effective grill maintenance, choose a brush with firm, heat-resistant bristles-preferably brass or stainless steel-to avoid damaging surfaces while ensuring strong cleaning power. Use consistent, back-and-forth brush techniques across the grates, then angle the brush to reach crevices in the firebox where soot accumulates. Avoid excessive pressure that might bend thinner grates. Cleaning while the grill is warm (but not scorching) helps loosen residue without risking injury. Nylon-bristled brushes work for lighter jobs, but metal variants deliver better results for heavy buildup. Regular use of proper brush techniques not only improves cooking performance but also extends your grill’s lifespan. Proper tool selection and methodical scrubbing make a noticeable difference in both hygiene and heat distribution.
Clean the Drip Pan and Grease Trap
While grease runoff is inevitable during charcoal grilling, letting it accumulate in the drip pan and grease trap can lead to flare-ups, unpleasant smoke, and even fire hazards over time. You should clean these components after every few uses to prevent grease buildup, which compromises both safety and flavor. Remove the drip pan carefully-especially if it’s hot-and scrape out solidified fat with a putty knife or similar tool. For the grease trap, empty any pooled liquid into a disposable container to avoid messes. Wash both parts with warm, soapy water and a non-abrasive sponge, making sure to clear any clogged drain channels. Thorough drying is essential for rust prevention, as moisture trapped in metal trays accelerates corrosion. Reinstall only when completely dry. A well-maintained drip system improves grill performance and extends its lifespan considerably.
Wash the Exterior and Lid With Soapy Water
After handling the internal components, turning your attention to the exterior surfaces helps maintain both the grill’s appearance and functional integrity over time. Grab a soft cloth or sponge and dip it into warm, soapy water-mild dish soap works best. Gently wipe down the entire exterior and lid, paying close attention to corners and seams where grease and grime accumulate. For stainless steel models, use a cleaner designed to enhance stainless steel shine without damaging the finish. Avoid abrasive pads, as they can cause exterior streaks and dull the surface. Rinse with a damp cloth to remove soap residue, then dry thoroughly with a clean towel. Regular cleaning prevents buildup that can corrode surfaces or make future maintenance harder. A well-wiped exterior not only looks better but also protects the grill’s structure from weather and wear, ensuring reliable performance season after season.
Reassemble and Check for Damage
Since the grill’s components are clean and dry, you’re ready to put everything back together, and doing it right guarantees both performance and longevity. Begin with a thorough component inspection-check the cooking grates, firebox, and dampers for cracks, warping, or rust that could impair function. Replace any damaged parts to maintain efficiency and safety. Reinstall the charcoal grate first, ensuring it’s level and secure. Then, position the cooking grates and confirm they sit evenly to allow consistent heat distribution. Proper grill alignment prevents hot spots and supports even cooking. Misaligned components can disrupt airflow and fuel consumption, undermining your BBQ results. Finally, verify that the lid closes tightly and the vents operate smoothly. A well-assembled grill not only performs better but also extends the life of the unit.
On a final note
You’ve done the work, and now your grill runs better for it. Regular cleaning keeps heat distribution even and prevents flare-ups, extending the grill’s life. Proper maintenance guarantees safer, more consistent cooking-key for anyone serious about outdoor BBQ. Grease buildup and ash compromise performance, so don’t skip steps. This routine isn’t just upkeep; it’s how you protect your investment and improve every cook.