How to Build a Safe and Efficient Open Pit Fire for Outdoor Cooking in Your Backyard
Pick a level, bare spot at least 10 feet from structures and trees, then ring it with heat-resistant stones or a thick steel fire ring to contain sparks and boost heat retention. Use a raised metal grate or rock bed for airflow, helping your fire burn hotter and cleaner. Start with kindling and seasoned hardwood, maintaining coals-not flames-for steady cooking. With the right setup and tools, you’ll get better control, fewer flare-ups, and more consistent results every time.
Notable Insights
- Choose a safe location at least 10 feet from structures and flammable materials, on bare, level ground to prevent fire spread.
- Build a flame-proof ring using heat-resistant stones or a thick-gauge steel fire ring to contain sparks and stabilize heat.
- Use seasoned hardwoods like oak or hickory and start with kindling to establish a steady, controllable fire for cooking.
- Elevate the fire with a metal grate or rock bed to improve airflow, reduce ash buildup, and enhance combustion efficiency.
- Maintain cooking heat by adjusting log placement, clearing ash, and focusing on glowing coals rather than open flames.
Choose a Safe Spot for Your Pit Fire
When selecting a location for your open pit fire, start by finding a spot at least 10 feet away from any structures, overhanging branches, or flammable materials-safety comes first, and a small spark can lead to big trouble if conditions aren’t controlled. You’ll want to prioritize fire safety by choosing bare ground over grass or mulch, which can ignite easily. Consider wind patterns, too, since they directly affect smoke management; nobody enjoys choking on smoke during dinner prep. Position the pit so prevailing breezes carry smoke away from seating and cooking areas. A level surface prevents rolling logs and uneven burns, enhancing both control and efficiency. Though some backyard cooks overlook airflow, proper placement reduces flare-ups and improves combustion. Ultimately, a well-chosen site supports safer burns, cleaner cooking, and a more enjoyable outdoor experience-proving that the foundation of great BBQ starts long before the flame even strikes. For added durability and heat resistance, consider lining your fire pit with heat-resistant rocks chosen specifically for high-temperature environments.
Gather Stones, Metal Rings, and Fire Tools
A sturdy ring of heat-resistant stones or a purpose-built metal fire ring isn’t just a boundary-it’s a critical component in containing heat, protecting your yard, and maintaining consistent cooking temperatures. When opting for stone, your stone selection must prioritize dense, non-porous types like granite or fieldstone; avoid river rocks, which can explode under intense heat. Metal rings offer convenience and uniformity, especially if made from thick-gauge steel designed for fire pits. Either way, make sure the ring is wide enough to hold logs securely and minimize spark spread. For tools, gather a long-handled poker, tongs, and a grill grate lifter-each should feel balanced and durable. Regular tool maintenance prevents rust and makes sure smooth function; wipe them down after use and store in a dry place. Proper tools and a well-constructed fire barrier directly impact cooking control, safety, and long-term usability. Consider choosing a best fire pit for cooking that combines durability with cooking functionality for optimal backyard results.
Build a Flame-Proof Ring for Your Pit Fire
You’ve gathered your stones, metal ring, and tools-now it’s time to put them to use by building a flame-proof ring that keeps your fire contained and your cooking efficient. Start by placing heat-resistant stones in a tight circle, or set a steel ring directly on non-combustible ground. Both options offer solid fire containment, preventing sparks from spreading and ensuring safety. A stone ring adds natural insulation, boosting heat retention, while a metal ring provides durability and consistent shape. Over time, stone may crack from thermal stress, but properly layered rocks can last seasons. Metal won’t degrade as quickly, though it may warp if thin-gauge. For best results, use a ring at least 12 inches high to shield flames from wind. This setup stabilizes heat, giving you even cooking temps-ideal for searing meats or simmering sauces. Effective fire containment and strong heat retention are essential, not optional, for safe, high-performance backyard cooking. For reliable performance, choose a best fire pit ring from models designed specifically for outdoor cooking and durability.
Create a Raised Fire Bed for Better Airflow
Though often overlooked, elevating your fire above the ground can make a noticeable difference in how evenly and efficiently it burns. By building a raised fire bed using metal grates or stacked rocks, you enhance airflow optimization, allowing oxygen to circulate beneath the flames for a hotter, more consistent burn. This setup supports elevated grilling, giving you better control over cooking temperatures and reducing flare-ups caused by dripping fats. Unlike ground-level fires, which can smother from ash buildup, a raised bed maintains steady combustion and simplifies cleanup. You’ll also find it easier to manage fuel placement and ember distribution. For backyard cooks seeking efficiency and performance, this small modification offers measurable benefits. While not essential, it’s a smart upgrade-especially when using hardwoods or lump charcoal that thrive with steady airflow. Proper elevation turns a simple pit into a reliable outdoor cooking system.
Start Your Pit Fire and Control Cooking Heat
Once your raised fire bed is in place, getting the fire started the right way sets the tone for everything from heat consistency to flavor development, and skipping proper ignition techniques can sabotage even the best-prepped pit. Use kindling and small splits to ignite the base, then gradually add larger logs to avoid smothering the flames. Fuel management is vital-overloading cools the fire, while too little fuel leads to rapid temperature drops. Maintain steady heat regulation by adjusting log placement and spacing, allowing airflow without encouraging runaway flames. You’ll want coals, not blaze, so monitor burn rate and remove ash buildup early. Seasoned hardwoods like oak or hickory offer longer, more predictable burns than softwoods, enhancing both efficiency and flavor. Proper technique guarantees even cooking and prevents flare-ups, so stay attentive and fine-tune as needed.
Grill Over Coals, Not Flames
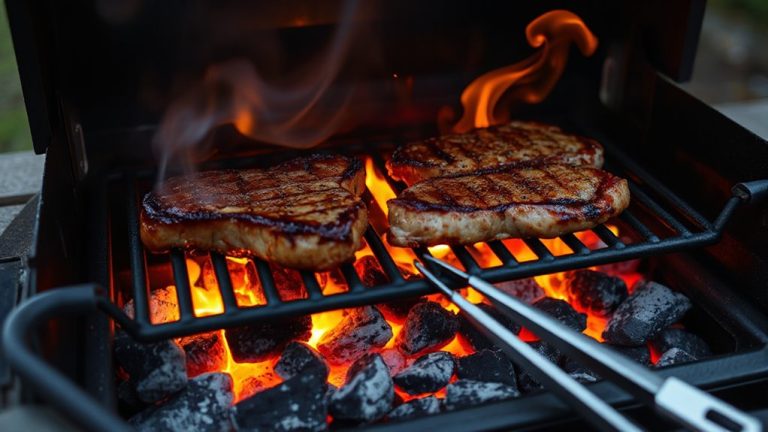
Grilling over glowing embers, not roaring flames, is where outdoor cooking truly earns its flavor. You’ll achieve better heat management by waiting until the fire settles into hot, gray-edged coals-this is the ideal stage for most grilled foods. Flames char the outside while leaving the inside undercooked, but steady radiant heat from coals guarantees even doneness. This cooking technique requires patience, but it delivers superior results, especially for thicker cuts or delicate items like fish. Adjust your grill height or shift food to zones with varying coal density to fine-tune temperature. Direct heat works for searing; indirect, for slower cooking. Proper heat management prevents flare-ups and gives you control. You’re not just cooking-you’re mastering fire’s rhythm. Consistent coals mean consistent meals, making this method both efficient and reliable for backyard barbecuing done right.
On a final note
You’ve built a safe, efficient pit fire ideal for backyard cooking. Proper stone placement and airflow guarantee steady, controllable heat, while grilling over coals-not flames-gives better sear and flavor. This setup performs well for slow roasting or direct grilling, blending tradition with practical design. With routine ash clearing and dry storage of tools, your fire pit stays durable and ready. It’s a reliable, low-tech solution that outperforms portable grills in flavor and heat consistency.