Installing Aftermarket Thermometers on Charcoal Grills Without Drilling Mistakes
You’ll get reliable temps by choosing a digital thermometer with ±2°F accuracy and a stainless steel housing for durability. Mount it on the lid’s center to avoid heat swings near vents or edges. Use a step bit at low speed with cutting fluid to prevent warping or rust. Secure the stem snugly, then calibrate using an ice bath. Proper placement and care guarantee steady performance-especially during long smokes where consistency matters most. There’s more to mastering your setup than just placement.
Notable Insights
- Use a digital probe thermometer with ±2°F accuracy for precise readings without relying on drilled-in analog dials.
- Choose a clamp-on or magnetic thermometer to avoid drilling entirely and ensure easy placement on the grill lid.
- If drilling is necessary, match the drill bit to your grill’s material and use cutting fluid to prevent warping or overheating.
- Mount the thermometer in the center of the lid, 2–3 inches above the grate, to measure ambient temperature accurately.
- Seal any drilled edges with high-heat, rust-resistant coating to prevent moisture intrusion and long-term damage.
Choose the Right Thermometer for Your Charcoal Grill
You’ll want to pick a thermometer that matches both your cooking style and the design of your charcoal grill, since not all models deliver the same level of accuracy or durability. Analog dial thermometers are common but often lag in temperature accuracy, especially in fluctuating conditions. Digital probes respond faster and offer better precision, vital if you’re searing steaks or smoking brisket for hours. Look for sensors with strong temperature accuracy-within ±2°F-to guarantee consistent results. Material compatibility matters just as much; stainless steel housings resist rust and handle high heat, while plastic components may warp or degrade. Some thermometers use materials incompatible with frequent temperature swings, leading to cracked lenses or failed seals. You’re better off choosing models built for outdoor use, with weather-resistant casings and secure sensor mounts. A good fit means reliable readings over time, even when the grill’s pushed to its limits. Prioritize build quality and sensor reliability-it’ll save you frustration down the line. For dependable performance, consider investing in a best meat thermometer that suits your grilling needs.
Pick the Best Spot to Mount Your Thermometer
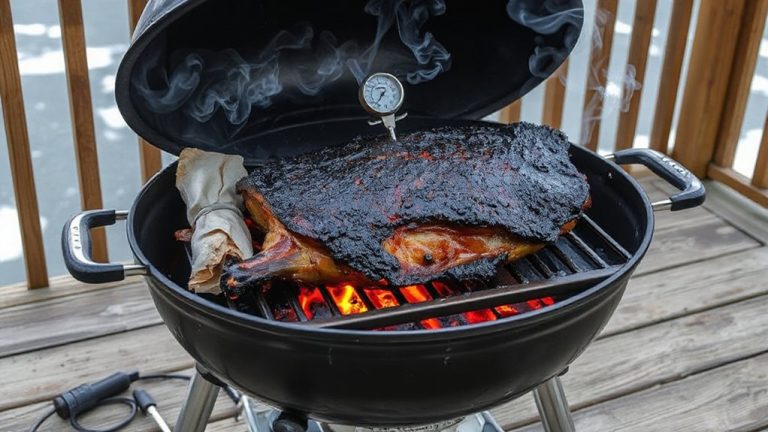
Where should you actually place the thermometer for the most accurate reading? You’ll want to mount it on the lid, near the center, where heat distribution is most consistent. Avoid spots too close to the edges or vents-those areas experience uneven thermal expansion and fluctuating temperatures. Since most cooking happens near the grate, the lid gives you a reliable average of the ambient temperature inside. Placing it lower, like on the bowl, risks false readings from direct radiant heat or cold spots. Plus, thermal expansion from frequent heating and cooling can misalign poorly positioned gauges over time. You’re better off keeping it high, where airflow evens out hot and cold zones. This spot reflects real cooking conditions, especially for slow BBQs where stability matters. Proper placement guarantees you’re not just guessing-it means trusting the numbers when it counts. For the most reliable results, choose one of the best thermometers recommended for consistent accuracy and durability.
Drill Safely Without Causing Rust or Warps
While drilling into your grill’s lid might seem straightforward, doing it wrong can lead to warped metal or persistent rust that undermines both performance and longevity. You need to take into account material compatibility-drilling through stainless steel requires different bits and pressure than cast iron or painted steel. Use a slow speed and light pressure to prevent overheating, which distorts the metal and creates weak spots. Apply cutting fluid to reduce friction and heat buildup, minimizing warps. Proper ventilation techniques, like allowing the drill bit to clear metal shavings frequently, prevent clogging and overheating. After drilling, remove all burrs and clean the area thoroughly to avoid moisture traps that cause rust. Seal the edge with a high-heat, rust-resistant coating to protect the exposed metal. These steps guarantee a clean, durable hole that maintains your grill’s integrity over time.
Install Your Thermometer Step by Step
Once the hole’s been drilled cleanly and all sharp edges smoothed, installing the thermometer becomes a simple but precision-sensitive task. You slide the stem through the hole from the outside, ensuring a snug fit-any gaps compromise both seal and accuracy. Secure it with the backing nut, tightening just enough to hold without stripping the threads. Now’s when installation timing matters: do this before seasoning the grill or lighting your first fire, so everything settles properly. Positioning affects both function and thermometer aesthetics-place it 2–3 inches above the grates for ideal air temperature readings. Avoid aiming it directly at the firebox; radiant heat skews results. A well-placed unit blends utility with clean visual appeal, complementing the grill’s design. Choose models with flush-mounted dials for a sleeker look. This small detail enhances usability and overall build quality, making monitoring easier without distracting from your cooking experience.
Test and Calibrate for Accuracy
How accurate is your grill’s temperature reading, really? After installation, you need to test and calibrate your thermometer to trust its data. Many aftermarket models offer decent analog accuracy, but they can drift over time or read a bit high or low straight from the factory. To verify, perform a simple ice water or boiling water test-these provide known baselines at 32°F and 212°F respectively. Check how closely your thermometer matches. Digital precision shines here, with models often featuring recalibration functions to correct any offset. Don’t assume your reading is perfect; even small variances affect cooking results. A well-calibrated tool guarantees you’re not undercooking briskets or drying out chicken. Regular testing also catches wear, especially in analog units exposed to thermal cycling. Accuracy matters just as much as placement-both define your thermometer’s real-world reliability.
Use Your Thermometer Like a Pro
Ever wonder why some cooks pull off perfectly smoked meats with consistent results? They treat their thermometer as a command center. You’ve installed it right and calibrated it-now trust the temperature reading to guide every decision. Don’t just glance at the number; watch how it trends over time. A steady climb means good heat distribution, while erratic swings suggest airflow issues or uneven coal placement. Position the probe near your meat, not near the coals, to reflect cooking-zone conditions accurately. Remember, lid placement and vent control directly impact both temperature reading and heat distribution. Use the thermometer to fine-tune vents, not guesswork. Over time, you’ll see patterns-like how opening the top vent too wide spikes temps fast. Mastering this turns guesswork into precision. With consistent monitoring and smart adjustments, you’re not just grilling-you’re controlling an environment. That’s how pros do it. For even greater convenience, consider using a wireless meat thermometer to monitor temperatures remotely without lifting the lid.
On a final note
You’ve picked a reliable thermometer, mounted it correctly near the dome’s top, and avoided rust by sealing the drill site. Now, accurate readings give you real control over low-and-slow or high-heat sessions. A well-installed gauge transforms guesswork into precision, boosting both safety and results. Over time, proper care guarantees durability and consistent performance, making it a smart upgrade for serious outdoor cooking.