Step-by-Step Instructions for Cleaning a Charcoal Grill After Each Cook
Let your grill cool for 20 to 30 minutes-enough to be safe but still warm for easier cleaning. Empty ash from the base through the drain door using a metal tool, then scrub the grates with a wire brush to remove stuck-on residue. Wipe grease from the lid and exterior with a damp cloth or mild soapy sponge, avoiding abrasives that scratch finishes. Remove and wash the drip tray once cool to prevent clogs and fire risks. Keep components well-maintained to guarantee lasting performance and cleaner cooks. There’s more to optimizing your routine for better results and less hassle.
Notable Insights
- Let the grill cool for 20–30 minutes after cooking to safely handle hot components and prevent burns.
- Empty ash and debris from the base using a metal tool and dispose of it in a metal container.
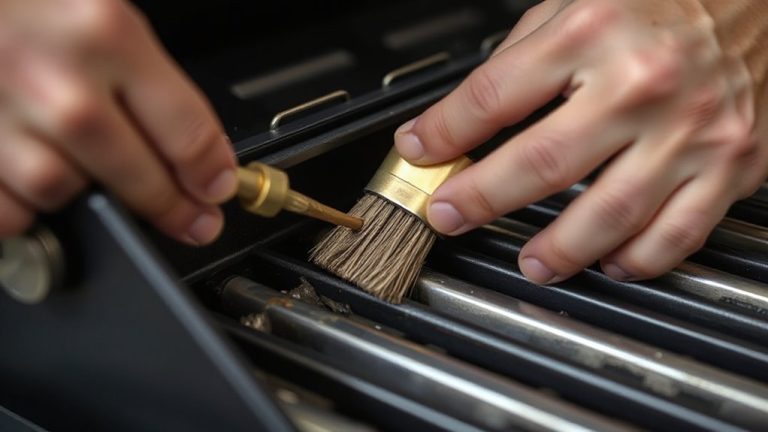
- Clean grill grates with a wire brush while warm to remove stuck-on residue easily and maintain performance.
- Wipe the inside of the lid and exterior surfaces with a damp cloth or mild cleaner to prevent grease buildup.
- Remove and wash the drip tray with soapy water once cool to avoid fire hazards and grease overflow.
Wait for the Grill to Cool Slightly
While you might be keen to get started, waiting for the grill to cool slightly before cleaning is key to both safety and effectiveness. Rushing into cleanup while the grill is still blazing hot risks serious burns and compromises your technique-tools slip, ash scatters, and residue sticks stubbornly. Proper cooling time, roughly 20 to 30 minutes after extinguishing the fire, brings the unit to a warm-but-safe temperature, making debris easier to manage without danger. This pause isn’t just about comfort; it’s a core aspect of grill safety. The metal retains intense heat, especially near the charcoal chamber, and premature contact can damage tools or warp components. Letting it rest also stabilizes internal temperatures, preventing accidental flare-ups during cleaning. Seasoned grillers know this interval improves control and efficiency. Respecting cooling time reflects sound judgment-critical for those who value performance and longevity in their outdoor cooking equipment.
Empty Ash and Debris From the Base
After the grill’s temperature has safely dropped, it’s time to tackle the ash and debris collected in the base. Begin ash disposal by checking your grill’s drain or access door-most models include one to simplify cleaning. Use a metal ash tool or small shovel to scoop out residue, directing it into a metal container; never use plastic, as residual heat can cause damage. Proper ash disposal prevents moisture buildup and corrosion, extending your grill’s lifespan. For debris removal, run a stiff brush over the base to dislodge leftover char and grease fragments-these can impede airflow and affect future temperature control. A clean base supports consistent performance, especially during long cooks or searing sessions. Ignoring this step risks clogs and uneven burns. While it might seem minor, routine debris removal reflects a deeper commitment to grill maintenance and cooking precision.
Scrub the Grill Grates While Warm
Once you’ve cleared the ash and debris from the base, shift your attention to the grates where flavor buildup and residue can直接影响 your next cook. With the grill still warm-not scalding hot-use a sturdy wire brush to scrub off carbonized food particles and grease. This is the sweet spot: warm grates allow residue to lift more easily than when stone cold, reducing effort and improving cleaning efficiency. Proper grill maintenance at this stage prevents flare-ups and guarantees even heat distribution next time. If you’ve been diligent with grate seasoning, a light coating of oil will protect the metal and enhance non-stick performance over time. Don’t skip this step-consistent care extends grate life and improves cooking results. While stainless steel holds up well, cast iron demands extra attention to seasoning to prevent rust. Effective cleaning now saves you from deep scrubbing later and keeps your grill in peak condition. For optimal results, choose one of the best grill brushes that combine durability and effective bristle design to handle tough residue without damaging the grates.
Clean Grease From Lid and Exterior Surfaces
A well-maintained grill isn’t just about spotless grates-it starts with tackling the grease that sneaks onto the lid and coats the exterior during every cook. Grease buildup on the lid can lead to flare-ups and contribute to long-term heat damage, weakening metal integrity over time. Use a damp cloth with soapy water or a degreaser to wipe down the inside of the lid while it’s still warm-doing so loosens residue without risking warping. For the exterior, avoid abrasive tools that scratch enamel or painted surfaces. Instead, use a soft brush or sponge and mild dish soap. Stainless steel models benefit from directional wiping to maintain finish integrity. Regular cleaning prevents corrosive residue accumulation and preserves structural performance. Ignoring these surfaces may seem harmless, but consistent neglect accelerates wear, compromises safety, and dulls your grill’s appearance-hardly worth the few minutes it takes to maintain them. For tough residue on stainless steel, consider using a dedicated stainless steel cleaner that lifts grease without damaging the protective layer.
Empty and Wash the Drip Tray
You’ll want to tackle the drip tray early in your cleaning routine since it’s one of the grimiest parts of the grill and plays an essential role in both safety and performance. Built to catch excess fats and cooking residues, this tray prevents flare-ups and reduces fire hazards. For effective drip tray maintenance, remove it carefully while cool and discard accumulated grease-never pour it down drains, as it can cause blockages. Wash the tray with warm, soapy water, scrubbing off stuck-on grime with a non-abrasive pad to avoid damaging the surface. Rinse thoroughly and let it dry before reinserting. Consistent cleaning supports long-term grease overflow prevention, preserving your grill’s efficiency and minimizing sudden combustion risks during future use. Neglecting this step not only compromises hygiene but can degrade materials over time, especially on models with enamel or coated finishes.
Cover and Store to Prevent Damage
While your charcoal grill may seem rugged enough to withstand the elements, leaving it exposed over time invites corrosion, warping, and buildup that can shorten its lifespan. Proper weather protection is essential-invest in a durable, fitted grill cover that seals out rain, snow, and UV rays, which degrade both metal and finishes. A covered grill also supports effective pest prevention, deterring rodents and insects from nesting in burners or grease trays. Store your grill in a dry, sheltered area when possible, like a garage or covered patio, especially during off-seasons. Even high-quality grills suffer unnecessary wear without consistent care. You’ll preserve performance, maintain cleanliness, and avoid clogs or rust that affect heat distribution. Covering and storing isn’t just cosmetic-it’s a functional step that extends longevity and guarantees reliable starts and even cooking. Good maintenance habits make every cookout smoother and your equipment more dependable over years of use. For long-term protection, choose a cover with best weather-resistant materials to ensure durability in harsh conditions.
On a final note
You’ve maintained your grill well by clearing ash, scrubbing grates, and wiping grease-key steps for peak performance. Proper cleanup prevents flavor contamination and extends equipment life. A well-cared-for charcoal grill delivers consistent heat and better searing over time. While upfront effort matters, long-term rewards include reliable, flavorful results. Regular maintenance beats deep cleaning later, making each cook easier and safer. This routine isn’t just upkeep-it’s part of mastering outdoor cooking.