How to Adapt a Rocket Stove for Grilling With a Custom Grate
You can turn your rocket stove into an efficient grilling setup by adding a custom grate that elevates food above the flame for better heat control and airflow. Use heat-resistant 304 stainless steel or seasoned cast iron to withstand high temperatures and repeated use. Measure your stove’s firebox opening precisely, allowing slight tolerance for expansion. A welded rebar grate offers durability and even heat circulation, though no-weld options like modified oven racks work for lighter use. Secure it with ledge supports or retaining clips to prevent shifting during cooking. Clean the grate with a wire brush while warm and oil it with food-grade oil to prevent rust. Proper maintenance guarantees long-term performance and consistent results. There’s more to optimizing your setup for peak efficiency and flavor.
Notable Insights
- Add a grate to elevate food, improving heat control and airflow for efficient grilling.
- Choose heat-resistant materials like 304 stainless steel or seasoned cast iron for durability.
- Measure the firebox throat accurately to ensure a proper, secure grate fit.
- Build a welded grate for strength or a no-weld version for easier assembly.
- Install the grate securely using supports or clips and maintain it with oil after cleaning.
Add a Grate to Grill on Your Rocket Stove
Functionality matters most when transforming your rocket stove into a grilling setup, and the simplest upgrade-a grate-can make all the difference. You’re not just adding a surface to cook on; you’re improving heat distribution and control. A well-placed grate elevates food above the flame, allowing for better grill ventilation, which helps manage smoke and prevents flare-ups. This airflow also boosts fuel efficiency by promoting complete combustion, meaning you’ll use less wood over time. You’ll notice faster cooking and more consistent results, especially with foods that need direct, radiant heat. Unlike open flames, the combo of constrained burn chamber and elevated cooking surface mimics real barbecue conditions. Plus, cleaning becomes easier since drippings fall away from the fire. It’s smart engineering: minimal cost, maximum performance. For backyard cooks seeking efficiency and precision, this upgrade is essential-not just convenient.
Pick Heat-Resistant Materials for Your Grate
Durability starts with the right metal, and when it comes to your rocket stove grate, not all materials stand up to the task. Material selection is critical because your grate faces intense, direct heat. Mild steel might seem easy to work with, but it warps fast and rusts without upkeep. You’re better off choosing something with high heat tolerance, like 304 stainless steel or seasoned cast iron. Both handle repeated thermal cycling well, though stainless offers better corrosion resistance. For DIY builds, salvaged burner grates from old grills or wood stoves often strike the right balance-proven performance without the high cost. Remember, a grate isn’t just a platform; it transfers heat evenly and supports your cookware under stress. Choosing wisely means fewer replacements and more consistent results. Skip low-grade metals-they’ll fail when you need them most.
Measure Your Rocket Stove’s Opening
Accuracy starts with the opening-your rocket stove’s firebox throat sets the stage for everything that follows. You need precise opening dimensions to guarantee your grate fits snugly and avoids heat leakage. Measure the width and depth of the opening with a tape measure, noting both inner and outer edges. These numbers directly determine your grill size, which must allow airflow while supporting cookware. Too narrow, and your grate won’t seat properly; too wide, and you’ll lose efficiency. The ideal fit balances stability and ventilation, maintaining high temperatures for searing and consistent radiant heat. Incorrect measurements compromise performance, leading to uneven cooking or grate warping over time. Always double-check-metal expands when hot, so slight tolerance matters. Getting the opening dimensions right the first time saves effort, enhances control, and maximizes the stove’s grilling potential without future modifications.
Build a Welded or No-Weld Grate
You’ve got a couple of solid options when it comes to building a grate for your rocket stove, and your choice between welding or going no-weld comes down to tools, skill, and how often you plan to use it. If you’ve got welding gear and know-how, a welded grate made from rebar or steel rods offers durability and stays put during heavy use. It allows precise spacing, which improves heat circulation and gives you better smoke control. For occasional grilling, a no-weld option using bent metal rods or a modified oven rack works fine and still supports solid flavor infusion. It’s easier to build and adjust, though it may need tweaking over time. Welded grates handle high heat longer without warping, making them ideal for consistent performance. No-weld versions suit beginners or low-budget projects but may lack long-term stability. Both can enhance your outdoor cooking if built thoughtfully.
Install the Grate Securely
Now that you’ve built your grate-whether welded for strength or fashioned without welding for simplicity-the next step is making sure it stays put when the fire’s roaring. Grill stability isn’t just convenient; it’s essential for even cooking and safety precautions. A wobbly grate can shift under food weight or thermal stress, leading to spills or burns. Secure it using ledge supports, pin slots, or retaining brackets built into the stove’s opening. Test the fit before firing up-gentle nudges should reveal zero movement. Below are key methods and their benefits:
| Method | Benefit |
|---|---|
| Ledge Support | Simple, no modification needed |
| Pin Slots | Prevents lateral shift, enhances stability |
| Retaining Clips | Easy removal, solid hold with safety in mind |
These choices directly impact performance, so pick based on your build’s design and your cooking habits.
Add Adjustable Height for Better Control
While maintaining a consistent flame is important, being able to tweak the cooking distance from that heat gives you far greater command over sear, smoke, and doneness. You can match the flame intensity to your desired result by simply raising or lowering the grate. A closer position delivers high-heat searing, ideal for steaks or vegetables needing char, while lifting the grate tempers the heat for slower cooking-think chicken or delicate fish. This adjustability boosts cooking precision, letting you respond in real time to flare-ups or uneven fuel burn. Fixed grates limit flexibility, but an adjustable system adapts to various foods and fuel loads. Simple solutions-like notched supports or sliding brackets-make height changes quick and stable. You’ll notice better control over crust formation, internal doneness, and smoke flavor infusion. In practice, this upgrade transforms your rocket stove from a basic cooker into a responsive grilling platform.
Clean and Maintain Your Rocket Stove Grate
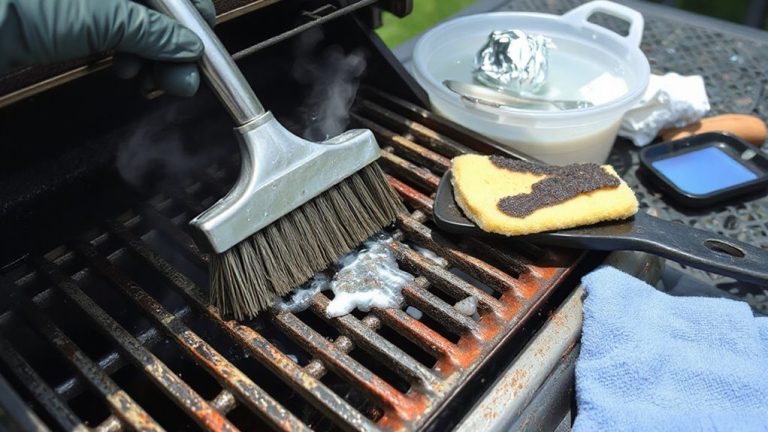
A clean grate isn’t just about appearances-it’s central to consistent performance and flavor control on your rocket stove. After each cook, remove residue with a stiff wire brush while the grate is still warm; this guarantees effective grill hygiene and prevents flavor contamination. For deeper cleaning, soak the grate in warm, soapy water and scrub with a non-abrasive pad-avoid harsh chemicals that can damage the metal. Dry thoroughly to support rust prevention, especially if your grate is made of untreated steel. Store it in a dry place or use a fitted cover when not in use. Applying a light coat of food-grade oil after cleaning adds a protective layer, maintaining integrity over time. Regular maintenance not only extends the grate’s lifespan but also guarantees your rocket stove delivers reliable, high-heat grilling with every use.
On a final note
You’ve now turned your rocket stove into a versatile grilling station. A well-fitted, heat-resistant grate improves cooking control and fuel efficiency. Adjustable height lets you manage searing versus slow-cooking with precision. Though assembly demands attention to weld strength or material compatibility, the payoff is consistent, high-temperature performance ideal for backyard BBQs or off-grid use. Proper cleaning extends the grate’s life and keeps flavors clean. This upgrade merges efficiency with practical outdoor cooking-smart, simple, and effective.