How to Clean Ash Buildup From a Rocket Stove After Extended Use
Let your rocket stove cool completely-60 to 90 minutes-so no heat radiates from the body or chimney. Clear loose ash with a soft brush or ash-rated vacuum, then scrub stubborn buildup in the combustion chamber and chimney using a stiff wire brush. Check for cracks, warped metal, or blocked vents, since obstructions hinder airflow and efficiency. Test with a small fire to confirm strong draft and clean burns. Proper cleaning keeps your stove running hotter and more efficiently, just like well-maintained outdoor cooking gear should-performance only improves with attention.
Notable Insights
- Allow the rocket stove to cool completely for 60–90 minutes before cleaning to prevent burns and thermal damage.
- Remove loose ash from the fire chamber and chimney using a soft brush or ash-rated vacuum.
- Scrub stubborn ash buildup in the combustion chamber and chimney with a stiff wire brush.
- Inspect for cracks, blocked vents, and damaged insulation to ensure proper airflow and safety.
- Test the stove with a small fire to confirm efficient burning, consistent heat, and minimal smoke.
Let Your Rocket Stove Cool Completely
While you might be keen to tackle the ash right after cooking, it’s essential to let your rocket stove cool completely before starting cleanup. Rushing this process risks burns and can damage components due to thermal shock, making stove safety a top priority. The ideal cooling time varies depending on usage and build-typically 60 to 90 minutes-but thicker metal models retain heat longer. You should wait until no warmth radiates from the body or chimney, and visible parts return to ambient temperature. This pause isn’t just precautionary; it allows ash to settle and harden slightly, setting the stage for easier removal later. Ignoring proper cooling time compromises both safety and efficiency, undermining the stove’s durability. In outdoor cooking scenarios where reliability matters, respecting thermal dynamics enhances long-term performance. Letting the system rest is a small delay that supports consistent, safe operation across countless uses.
Clear Loose Ash and Debris
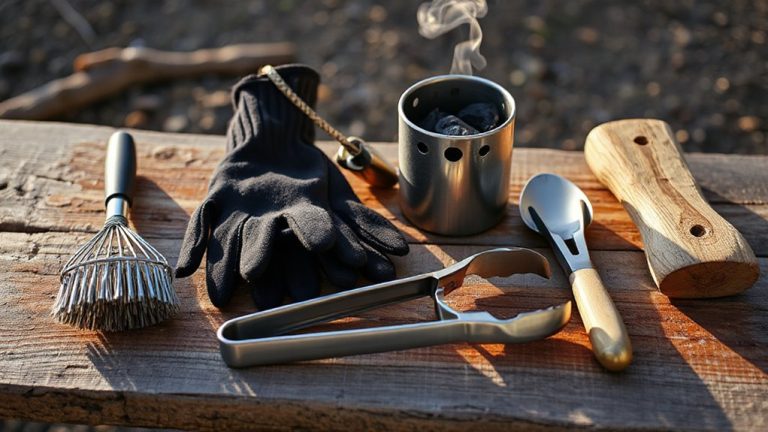
Start by gently removing any loose ash and debris from the fire chamber and chimney using a small brush or handheld vacuum designed for ashes. This initial step makes later cleaning much easier and reduces mess during ash removal. Be careful not to scratch internal surfaces-soft brass or nylon brushes work best. A vacuum specifically rated for ash guarantees safe debris disposal without spreading fine particles into the air. For frequent users, this routine maintains efficiency and prolongs stove life.
| Tool | Purpose |
|---|---|
| Ash vacuum | Safe ash removal, prevents airborne particles |
| Brass brush | Gentle debris removal, won’t damage surfaces |
| Metal tray | Catch falling ash during cleaning |
| Gloves | Protect hands during debris disposal |
| Dust mask | Avoid inhaling fine ash particles |
Always prioritize safety and precision with ash removal and debris disposal.
Scrub Ash From Combustion Chamber and Chimney
Now that you’ve cleared the loose ash and debris, it’s time to tackle the stubborn buildup that clings to the walls of the combustion chamber and chimney. Use a stiff wire brush to scrub the interior surfaces, paying close attention to corners where ash accumulates. You’ll notice the ash texture varies-fine and powdery near the top, but denser and crumbly near the burn zone, a sign of incomplete combustion. Removing this residue improves airflow and heat transfer, both critical for peak fuel efficiency. Over time, thick ash layers insulate the metal, forcing you to use more wood to achieve the same results. Regular scrubbing not only maintains performance but extends your stove’s lifespan. For best results, clean after every few uses, especially if you burn green or damp fuel. Proper maintenance secures consistent cooking temperatures and cleaner burns, making your outdoor cooking experience more efficient and enjoyable.
Inspect for Damage and Blocked Vents
A thorough inspection of your rocket stove’s structure and airflow system is key to safe, efficient operation. Start with crack detection-carefully examine the combustion chamber and outer shell for fractures or warping that could compromise performance. Even small cracks can expand under heat, posing safety risks. Follow with an airflow inspection: check all vents and channels for blockages or excessive residue. Proper airflow guarantees complete combustion and reduces smoke output. Use a flashlight to peer into narrow passages and confirm unrestricted passage. Here’s what to look for:
| Issue | Significance |
|---|---|
| Visible cracks | Structural weakness, heat loss |
| Chipped insulation | Reduced efficiency |
| Blocked intake vent | Poor airflow, hard starts |
| Obstructed chimney | Smoke backflow, incomplete burn |
| Corroded metal | Future failure risk |
Address any defects before next use.
Test the Stove After Cleaning
Once you’ve removed ash buildup and inspected for damage, it’s time to see how well your rocket stove performs under real conditions. Start a small fire using your usual fuel, letting it burn for 10–15 minutes. Watch how quickly the stove reaches cooking temperature-this tells you a lot about its heat output. A clean stove should generate consistent, concentrated heat with minimal smoke. You’ll likely notice improved fuel efficiency, meaning you need less wood to maintain a strong flame. That’s because airflow moves freely through clean channels, boosting combustion. Compare this session to how the stove ran before cleaning. If heat output feels weak or flames sputter, check for leftover blockages or draft issues. Proper testing confirms your maintenance work paid off, ensuring reliable performance the next time you cook outdoors.
On a final note
You’ve kept your rocket stove running efficiently by clearing ash and inspecting key components. Regular maintenance prevents airflow blockages and extends the stove’s lifespan. You’ll notice better combustion and heat control after each cleanout. For outdoor cooking enthusiasts, this care translates to consistent performance, whether simmering or searing. A well-maintained stove burns cleaner, uses less fuel, and supports sustainable practices-critical for eco-conscious campers and BBQ lovers alike.