Roast Marshmallows Evenly for S’mores: Minimal-Smoke Method
Start with a low, clean-burning fire using dry oak or maple to cut smoke and boost control. Hold your marshmallow at a 45-degree angle on a long skewer-metal works best-to guarantee even heat and less flare. Rotate it slowly every 10–15 seconds so it browns smoothly without charring. Pull it off the moment it turns golden; that’s when it’s gooey inside and perfect for s’mores. Timing and technique make all the difference, and there’s more to mastering the ideal roast where heat, angle, and motion align just right.
Notable Insights
- Start with a low, clean-burning fire using dry hardwoods to minimize smoke and ensure steady heat.
- Hold the marshmallow at a 45-degree angle to promote even browning and reduce flare-ups from dripping sugars.
- Rotate the marshmallow slowly and steadily every 10–15 seconds for uniform caramelization and consistent heat exposure.
- Use a long skewer made of appropriate material to maintain optimal distance from the flame and prevent sudden flare-ups.
- Remove the marshmallow at the first sign of golden brown to avoid charring and achieve a gooey, perfectly roasted texture.
Start With a Low, Clean-Burning Fire
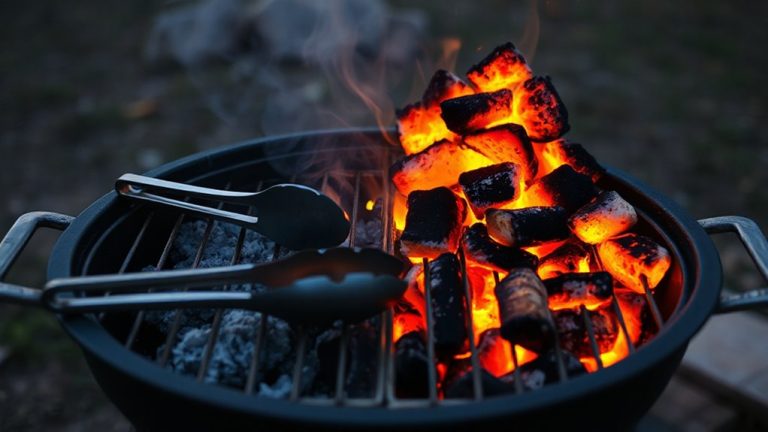
While you might be enthusiastic to get straight to roasting, starting with a low, clean-burning fire makes all the difference in how evenly your marshmallow cooks and how enjoyable the experience becomes. Proper firewood selection is essential-opt for dry hardwoods like oak or maple, which burn steadily and produce less smoke than softwoods. These woods maintain consistent heat, preventing flare-ups that char the outside before the inside softens. Equally important is airflow management; arrange your logs loosely to allow oxygen to circulate, sustaining combustion without excessive flames. A well-ventilated fire not only burns cleaner but also stabilizes temperature, giving you greater control. Avoid piling wood too tightly or using green timber, both of which hinder airflow and increase soot. With thoughtful setup, your fire becomes a reliable cooking tool-not just a heat source, but a foundation for perfect s’mores.
Hold Marshmallows at a 45-Degree Angle
You’ve built a steady, low flame with well-seasoned hardwood, and now it’s time to put that controlled fire to work by positioning your marshmallow correctly. Holding it at a 45-degree angle gives you superior angle control and ideal heat distribution. This tilt lets radiant heat rise evenly across the surface, minimizing hot spots and flare-ups. The angled position also allows dripping sugars to fall away without igniting, reducing smoke. For best results, use a straight roasting stick and maintain consistent distance from the coals.
| Angle | Heat Distribution | Smoke Risk |
|---|---|---|
| 45° | Even | Low |
| 90° | Uneven | High |
| 0° | Poor | Medium |
This method outperforms vertical or flat holds, offering predictability and control. Proper angle control means fewer charred exteriors and gooey centers-exactly what s’mores demand.
Rotate for Even, Smoke-Free Roasting
Since consistent browning and minimal smoke are key to a perfect marshmallow roast, rotating the marshmallow slowly and steadily makes all the difference. This simple motion guarantees even heat distribution, preventing hot spots that cause flare-ups and uneven charring. You’re not just toasting-you’re engineering ideal marshmallow browning through controlled exposure. Holding it at a 45-degree angle helps, but without rotation, one side often overheats while another stays raw. A full 360-degree turn every 10–15 seconds allows gradual, uniform caramelization. The sugars break down evenly, creating that golden crust without acrid smoke. Think of it like rotisserie cooking: consistent movement improves results. Proper rotation also lets you manage distance from the heat source more effectively, maintaining peak temperature exposure. It’s not dramatic-it’s deliberate. With practice, you’ll develop a rhythm that balances patience and precision, turning a simple campfire treat into a reliably delicious experience.
Use Long Skewers to Prevent Flare-Ups
At a safe distance from the flames, long skewers give you the control needed to avoid sudden flare-ups that ruin marshmallows with soot and uneven burns. Maintaining proper marshmallow distance is key-too close and you risk charring, too far and melting takes forever. The right skewer material affects heat conduction and safety. Metal skewers transfer heat quickly but can become hot near the handle; wood chars if too close, but offers better insulation. Below is a comparison to guide your choice:
| Skewer Material | Heat Conductivity | Ideal Marshmallow Distance |
|---|---|---|
| Stainless Steel | High | 6–8 inches |
| Bamboo | Low | 4–6 inches |
| Steel Rod | High | 6–8 inches |
| Hardwood Stick | Very Low | 5–7 inches |
| Copper-Coated | Very High | 8+ inches |
Choose based on control, safety, and how evenly you want your roast.
Keep Flames Low for Gooey Centers
A well-roasted marshmallow hinges not just on the right skewer but also on how you manage the fire beneath it. Keeping flames low gives you better caramelization control, letting the sugar develop flavor without burning the exterior. High flames cause rapid charring, trapping a cold, dense center-nobody wants that. Instead, a low, steady fire guarantees even heat retention across the marshmallow’s surface, slowly warming the inside until it turns molten and gooey. Think of it like slow-toasting bread: gentle heat yields depth, not destruction. You’ll notice the edges glow golden, not blackened, and the core melts just enough to ooze perfectly between graham crackers. For s’mores, this balance is essential-flavor over flare, patience over speed. A calm flame isn’t just safer; it’s smarter cooking. By mastering low-heat roasting, you elevate a simple treat into something consistently satisfying.
Stop Dripping Before It Starts
If you’ve ever watched a perfectly toasted marshmallow slip through the cracks and vanish into the fire, you know how quickly dripping can ruin both mood and meal. To control drips, use a roasting stick with a wide base or tine guard. Dripping sugar fuels flames, so managing it helps prevent flare ups that char your treat. Hold the marshmallow at a steady angle to let syrup run along the stick instead of falling. Rotate slowly-consistent motion guarantees even melting without weak spots that break loose. Consider metal skewers over wooden sticks; they’re smoother and easier to clean. Below are top tools for minimizing mess:
| Tool Type | Drip Control | Flare-Up Prevention |
|---|---|---|
| Metal Skewer | High | Excellent |
| Forked Stick | Medium | Good |
| Bamboo Stick | Low | Fair |
| Spiral Rod | High | Excellent |
| Tined Holder | High | Excellent |
Pull Off at the First Sign of Gold
When you see that first faint blush of golden brown creeping across the surface of your marshmallow, it’s time to act-waiting even ten seconds longer can push it from ideal to overdone. The golden timing you’re aiming for delivers the perfect marshmallow texture: soft, gooey, and just warm enough to melt chocolate without scorching it. Pulling it off at this stage prevents charring, which adds bitterness and ruins the delicate balance of a s’more. You’ll notice the surface begins to swell slightly-that’s the heat evenly expanding the interior. Trust this visual cue over intuition. Overroasted marshmallows lose their creamy consistency, turning rubbery or brittle. Achieving consistent results requires attention, not speed. This method works whether you’re over a campfire or propane grill. With practice, recognizing that initial golden glow becomes second nature-elevating your s’mores from haphazard to expertly crafted every time.
On a final note
You’ll get the best s’mores by balancing heat control and technique. A low, steady fire prevents charring, while a 45-degree angle and constant rotation guarantee even browning without excess smoke. Long skewers keep hands safe and minimize flare-ups. Pulling the marshmallow at the first hint of golden color locks in a gooey center. These methods, grounded in heat management and timing, elevate outdoor cooking from hit-or-miss to reliably delicious.