Step-by-Step Instructions for Achieving Restaurant-Quality Grill Marks on Any Meat
Start with a thick cut-1.5 inches or more-like a well-marbled ribeye or dry-aged steak. Pat it bone-dry so moisture won’t inhibit searing. Preheat your grill to at least 500°F with the lid closed, then oil the grates using a high-smoke-point oil on a towel held with tongs. Place the meat down and don’t move it until it naturally releases, ensuring a deep sear. Rotate 90 degrees, flip once, and sear the second side for crisp, restaurant-style crosshatch marks. You’ll find the exact techniques for mastering consistency and avoiding common errors just ahead.
Notable Insights
- Choose well-marbled, thick cuts (at least 1.5 inches) for even searing and juice retention.
- Pat the meat dry thoroughly to remove surface moisture and ensure a crisp, dark crust.
- Preheat the grill to 450–500°F with the lid closed for consistent, high-heat searing.
- Clean and oil the grates using a high-smoke-point oil to prevent sticking and flare-ups.
- Place meat on the grill and let it sear undisturbed before rotating 90 degrees and flipping once.
Choose a Thick, Seared-Ready Cut of Meat
A thick cut isn’t just a preference-it’s a necessity when chasing those deep, caramelized grill marks. Thin steaks cook too fast, never allowing the surface to sear properly before the inside overcooks. You want at least 1.5 inches-preferably 2-to build a rich crust while keeping the center tender. Look for high marbling content; those fine streaks of fat melt during grilling, basting the meat from within and amplifying flavor. A well-distributed pattern guarantees juiciness and helps sustain consistent heat transfer. Equally important is the aging process-dry-aged beef develops deeper taste and firmer texture, ideal for searing. The surface dries out slightly, making it easier to achieve that restaurant-quality char without scorching. Fresh or wet-aged works too, but dry-aged gives you an edge. Choose wisely: thickness, marbling content, and aging process all converge to define sear success. For steak lovers, selecting the best beef cuts ensures optimal results on the grill.
Pat Dry and Season for Maximum Searing
Even if you’ve picked the perfect cut, skipping the step of patting it dry means you’re already setting yourself up for a lackluster sear. Moisture on the surface steams rather than sears, sabotaging both crust development and grill marks. For best surface texture, use paper towels to remove all dampness-this simple act boosts browning and enhances flavor. If you marinated your meat, allow it to drain first; excess liquid hinders marinade penetration and prevents uniform seasoning. A dry exterior guarantees spices adhere properly and heat transfers efficiently. Below is a comparison of outcomes based on moisture levels:
| Moisture Level | Surface Texture | Searing Result |
|---|---|---|
| Wet | Soggy, uneven | Poor browning |
| Damp | Spotty contact | Inconsistent marks |
| Dry | Firm, tacky | Crisp, defined sear |
Season generously after drying for maximum flavor impact.
Preheat the Grill to High for Crisp Marks
Getting that perfect set of crisp, caramelized grill marks starts with one non-negotiable step: cranking your grill up to high and letting it heat thoroughly before you touch it with food. You need a grill temperature of at least 450°F-ideally 500°F-for effective searing. Without sufficient heat, proteins stick and marks come out pale or uneven. A well-preheated grill guarantees rapid Maillard reaction, locking in juices and building flavor. Equally important is heat distribution; uneven grates lead to patchy searing. Gas grills usually offer more consistent coverage, but charcoal users should spread coals evenly to avoid hot spots. Let the grill run for 10–15 minutes with the lid closed-it’s not overkill, it’s necessary. This stabilizes both temperature and distribution, setting the stage for clean, defined marks. Skipping this step risks steaming the meat instead of searing it.
Oil the Grates (Not the Meat) for Clean Searing
One effective move you can make for flawless grill marks is oiling the grates directly-skip brushing oil on the meat and focus on the metal instead. This guarantees better searing and reduces sticking without sacrificing flavor. Use a high-smoke-point oil like canola or grapeseed, and apply it with a tongs-held towel just after preheating. Proper grill maintenance keeps grates clean and rust-free, which improves both heat distribution and food release. Uneven heat or dirty grates lead to spotty marks and tearing, especially with delicate proteins. Oiling the grates promotes even contact, letting each sear line form crisply. It’s a small step, but it reflects deeper cooking logic: control surface interaction, and you control the sear. Plus, it avoids greasy meat and flare-ups. For consistent results, this method beats oiling the protein every time. Effective heat management starts with clean, well-oiled grates-so treat them like the cooking surface they are.
Sear the First Side Without Moving
You’ll want to lay that steak, chop, or fillet down and leave it exactly where it lands-no peeking, poking, or shifting. Letting it sit undisturbed is essential for developing crisp edges and proper sear marks. Movement disrupts contact with the grates, which breaks the chain of consistent heat transfer needed for effective caramelization control. When the surface stays put, moisture evaporates quickly, allowing Maillard reactions to build rich flavor and color. You’ll notice the meat naturally releases when the sear is complete-forcing it early causes sticking and torn edges. This technique isn’t just about looks; it’s a performance-driven step that guarantees even browning and texture contrast. Reliable caramelization control separates amateur attempts from restaurant-quality results. Patience here directly impacts the final presentation and taste, making it one of the most critical phases in outdoor searing. Resist the urge to adjust-trust the process.
Create Crosshatch Marks With a 90-Degree Flip
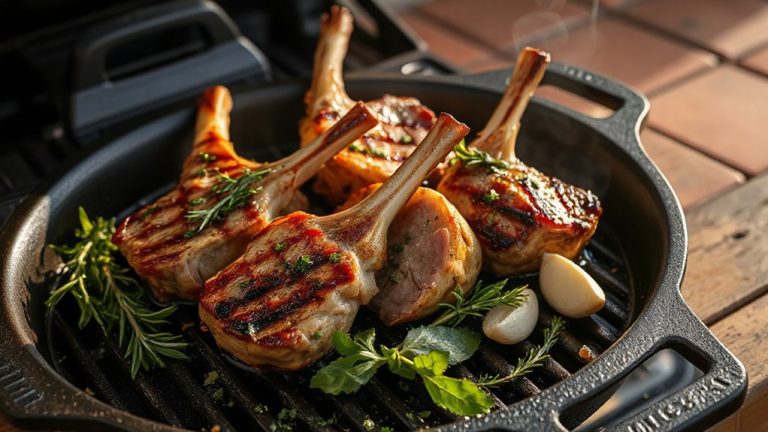
A single 90-degree flip is all it takes to achieve the classic crosshatch pattern seen in premium steakhouses, and it’s not just for show. Proper grill temperature guarantees quick, clean searing-aim for 450°F to 500°F so the meat releases easily and marks form without sticking. After searing the first side undisturbed, use tongs to rotate the meat a quarter turn and flip it. This precise flip timing locks in juices while creating defined lines. The second sear only needs 2–3 minutes, just enough to develop rich color and the perpendicular mark. Crosshatching isn’t just visual; it increases surface area for better flavor development. Done right, the technique reflects control over heat management and timing, hallmarks of skilled grilling. With consistent grill temperature and accurate flip timing, you’ll replicate the look and taste of expert-level barbecue at home, making each cut as impressive as it is delicious.
Troubleshoot Common Grill Mark Mistakes
If you’re seeing pale, uneven marks or meat that tears when flipped, chances are the grill isn’t hot enough or you’re moving the food too soon-both break the fundamental rules of proper searing. Inconsistent heat distribution often causes patchy marks, especially on cheaper grills with weak burners or blocked vents. Always preheat 10–15 minutes and check for hot spots using the hand test. Improper flip timing is another common error-flipping before a solid sear forms leads to sticking and ragged edges. Wait until the meat releases naturally; it’s ready when it lifts without resistance. Avoid overcrowding, as it lowers surface temperature and steams rather than sears. Clean grates are essential: residue prevents direct contact and messes with heat transfer. With consistent maintenance and attention to timing and heat, you’ll achieve clean, restaurant-quality marks every time. Using a reliable meat thermometer ensures your meat is cooked perfectly underneath those ideal grill marks.
On a final note
You’ve got the tools to achieve crisp, restaurant-quality grill marks: pick the right cut, prep it properly, and control heat and timing. Proper searing isn’t just about looks-it locks in flavor and builds texture. When done right, the Maillard reaction delivers a rich crust without drying the interior. Avoid common errors like moving meat too soon or overcrowding the grill. With practice, consistent results aren’t just possible-they’re predictable, turning casual cookouts into expert outdoor meals.